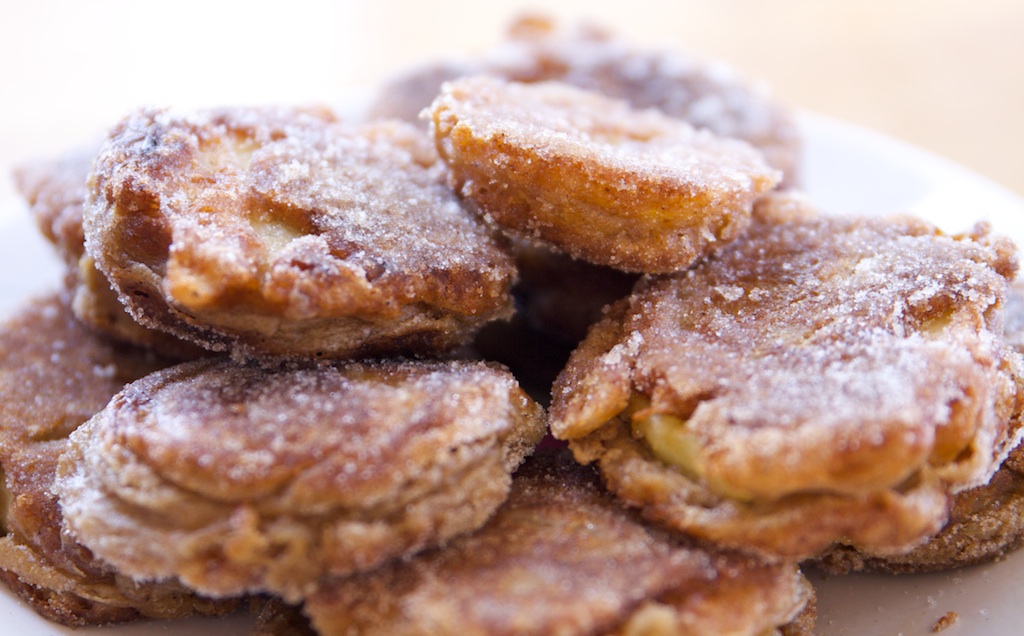
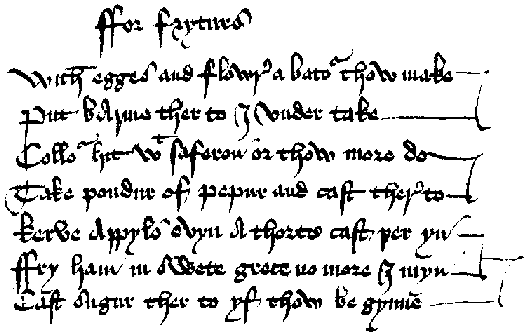
It is commonly said that the first recorded reference to a fritter is by Samuel Pepys in 1665. He does mention eating fritters on Shrove Tuesday, but this is certainly not the first mention of fritters. Indeed, this famous diary entry of Pepys is predated by a fifteenth century manuscript which details a recipe for apple "fryturs" (and features other recipes for "Gentyll manly Cokere", "copyd of the Sergent to the kyng"). Coincidentally, the manuscript is housed in the Pepys Library of Magdalene College, at the University of Cambridge and is known as MS Pepys 1047. You can read a transcription and translation at Gode Cookery.
We have adapted this recipe for the modern cook and hope you will enjoy these fritters as much as Samuel Pepys did. The batter is what makes them exceptional, and we suggest you try making other types of fritter with it. If you have any batter left over, simply fry it up like a pancake and sprinkle with the remaining cinnamon sugar. Cook's spoils!
Ingredients
400ml light ale
1 tsp dried yeast
250g spelt rye flour (or substitute)
1/2 tsp cinnamon
1 tsp ground ginger
1/4 ground cloves
pinch salt
pinch mace
pinch nutmeg
100g unsalted butter
5 egg yolks
1.5 kg sweet eating apples
castor sugar and cinnamon for dusting
beef dripping (or lard) for frying
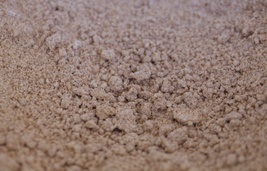
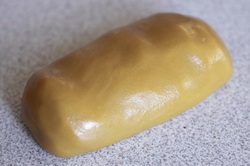
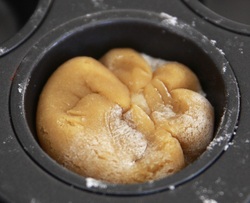
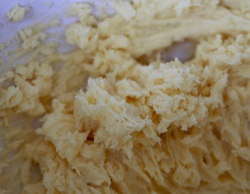
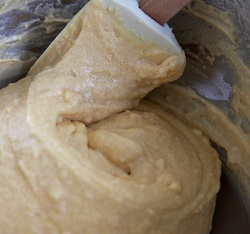
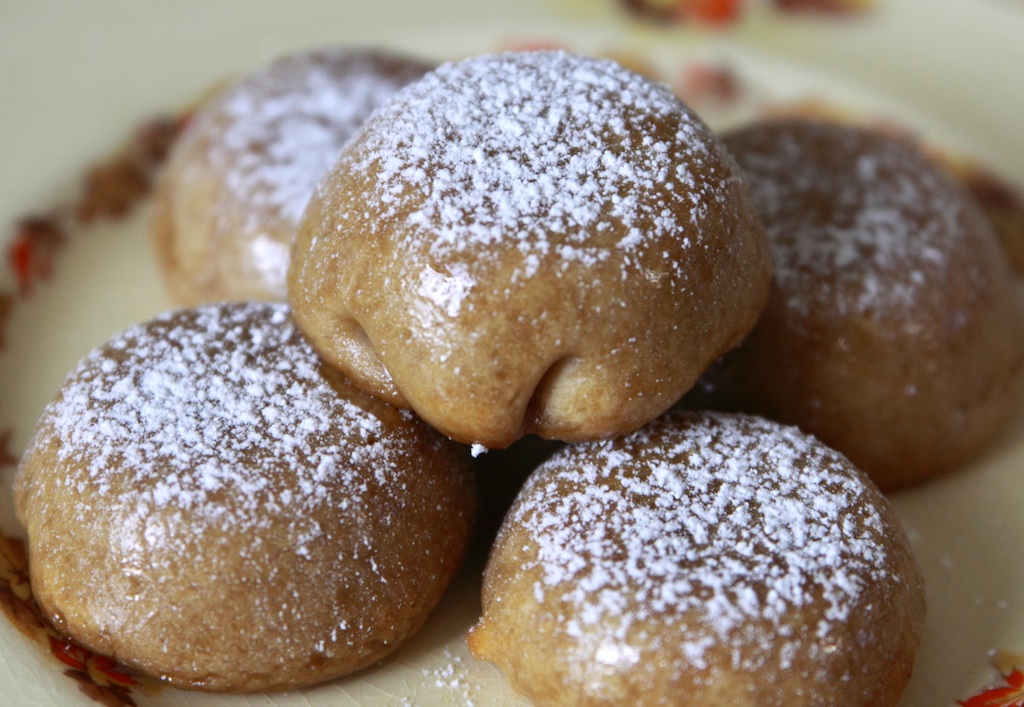
Warm the ale to blood temperature and add the yeast. Mix the salt and spices into the flour, then rub in the butter. It will resemble wet sand but smell delicious.
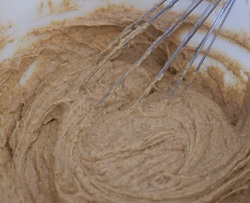
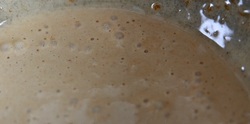
Beat in the egg yolks, then the ale, to make a batter. Resist the tantalising aroma (which should momentarily transport you into the fifteenth century if you close your eyes), and let it stand an hour or so.
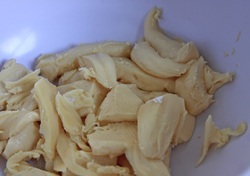
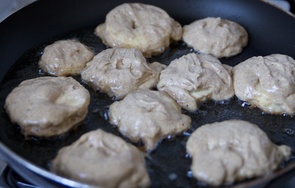 Peel and core the apples, then slice them into rings (no more than 1cm thick) and coat them in the batter. Fry the apple rings over moderate heat on both sides until golden brown. Toss in cinnamon sugar and serve.
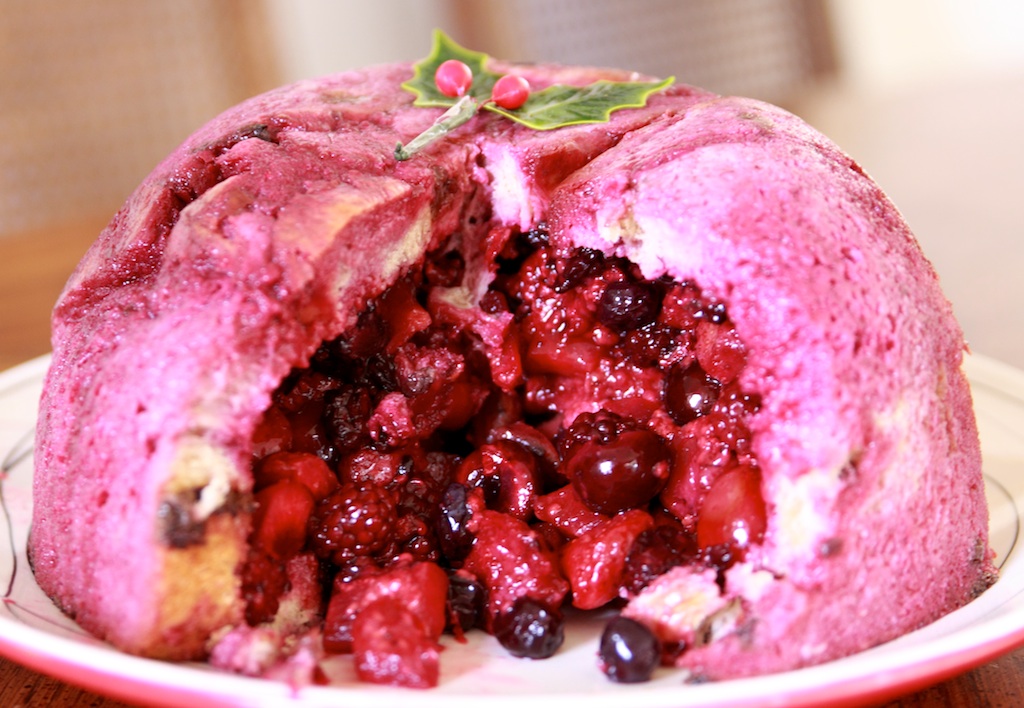
For those of us 'down under', the traditional Christmas pudding is often too heavy for a hot summer's day. The summer pudding has become a firm favourite, but in our opinion it lacks a little Christmas spirit. So, if you're still in a dither about a dessert for any of the twelve days of Christmas, we recommend our Tasmanian version.
Ingredients:
fruit loaf
2 apples
handful of cherries (halved and pitted)
1kg mixed berries
1 tsp mixed spice
150g raw castor sugar
3 tsp plum jam
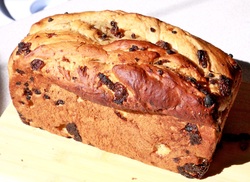 You'll need to cut seven or so slices from your fruit loaf if you've baked your own. (We used Mishka's hot cross bun recipe as the basis... which leaves a third of a loaf for the cook's morning tea.)
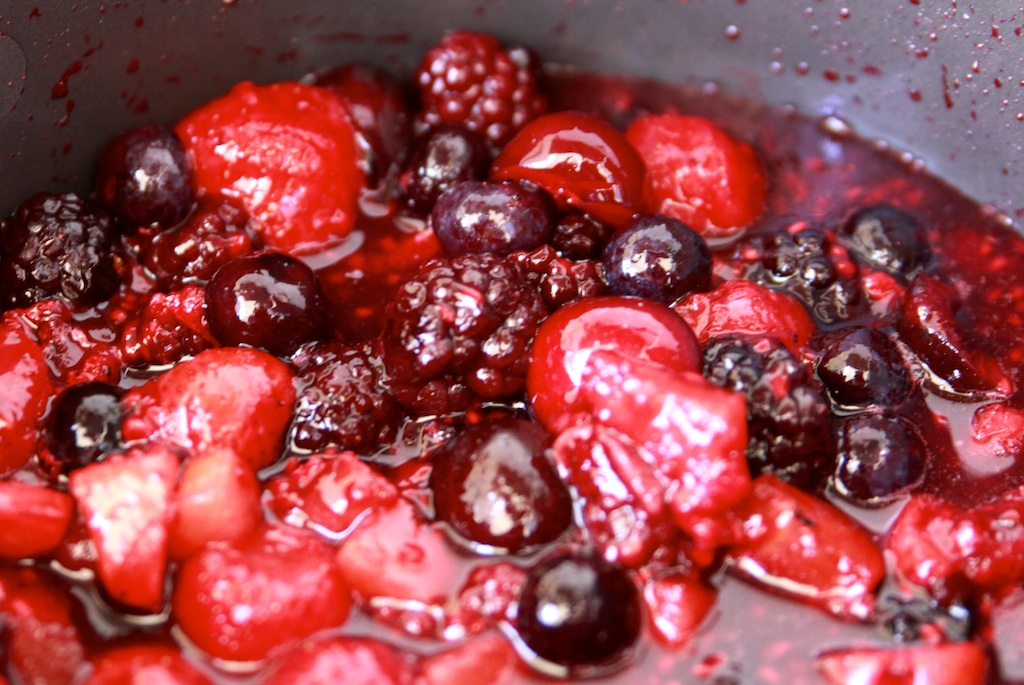
Peel, core, and dice your apples. Place them in a saucepan with the sugar, jam, spice, and a couple tablespoons of water. Bring to a boil for a few minutes, then add the cherries, followed by the mixed berries. Take it off the heat as soon as it begins to simmer.
Line a pudding bowl with cling wrap.
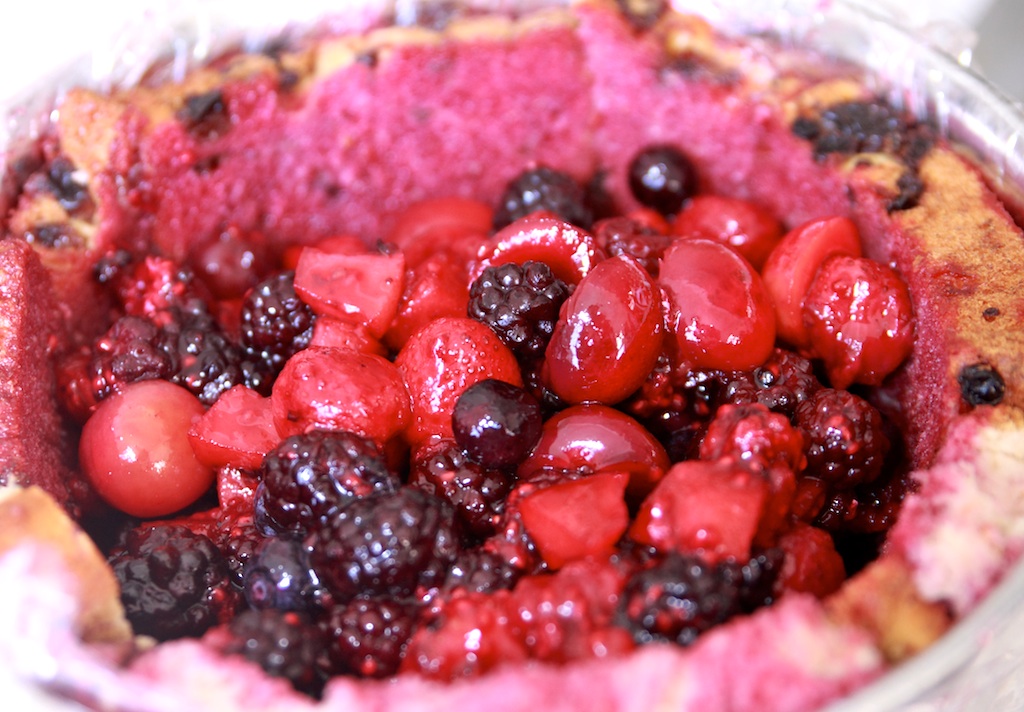
Drain the fruit so that you have the juice in a separate deep plate. Dip the slices of bread in the juice very briefly and line the pudding bowl, filling the gaps as necessary. Pour in the drained fruit, then top with more bread. Cover with cling wrap and place a plate on top. Refrigerate until ready, at which time invert onto a serving plate. Serve with cream whipped with brandy and icing sugar.
Merry Christmas from
the Historian and the Chef!
An intriguing message on our Facebook page earlier this year provided the impetus for this recipe.
The communication read:
Dear The Historian and the Chef,
Do you think there would be a Regency moon cake floating around somewhere?
Best wishes,
Moon cake lover
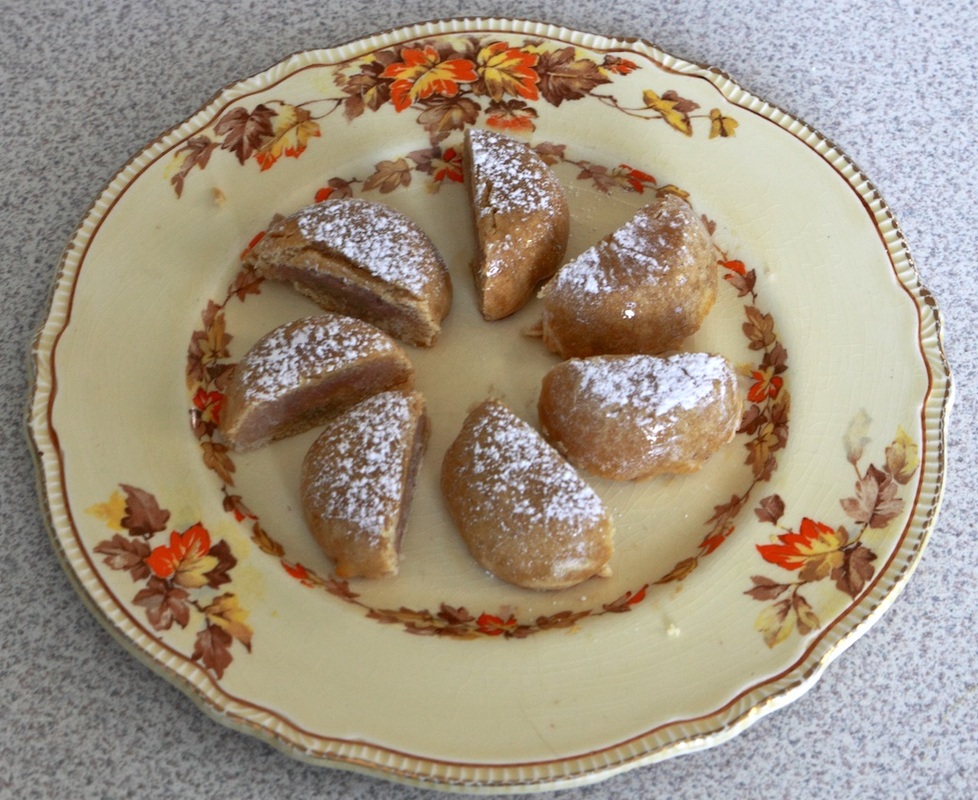
Although fairly cryptic, we assumed the reference was to something resembling the traditional Chinese Mid-Autumn Festival moon cakes. These are cakes so popular that the festival is commonly known as the Mooncake Festival. Was it possible that, along with their passion for Chinese tea, the Georgians also adopted moon cakes? Alas, despite Mishka's best efforts, we have been unable to discover any reference to moon cakes in the British Regency period, let alone a contemporary recipe. So we have devised an anachronistic one of our own.
To give our recipe a period feel, we decided that Mr Darcy and Miss Bennet and their contemporaries would have eaten moon cakes in the style of petit fours or sweetmeats. Consequently, ours are much smaller than the traditional oriental moon cake. We have also substituted butter for oil and a marzipan filling instead of lotus seed paste. For a quintessentially English Regency taste, we added gin and rose petals.
Ingredients
Pastry:
200g + plain flour
120g golden syrup
70g unsalted butter
Filling:
100g ground almonds
70g rose petal jam
1 tbl gin or brandy (optional)
1 egg
food colouring (optional)
Glaze:
1 egg
2 tsp golden syrup
4 tsp hot water
icing sugar to dust (optional)
Makes 24 small moon cakes
 Begin by pre-heating your oven to 180 degrees Celcius.
Heat the butter and golden syrup briefly - the butter doesn't have to melt, it just needs to be on the verge of doing so - and place them in a large bowl, preferably of your stand mixer. Sift in the 200g of flour and mix using the paddle attachment. Once combined, add a little more flour so that it is the right consistency for baking and knead briefly into a roll. Set aside in the fridge.
 Next, prepare your filling by mixing all the ingredients in a bowl. If you are concerned about raw egg, heat it in a saucepan. Add two or three drops of food colouring - we recommend red - if you prefer.
The rose petal jam can be substituted with any delicate fragrant jam, such as rose hip or quince jelly, but if you have access to roses it is easy to make. Simply boil up a couple of handfuls of petals with at least a cup of sugar and a minimal amount of water and add a squeeze of lemon juice after the petals become translucent. You can remove the petals with a slatted spoon (and eat them like lollies) or leave them in if you don't mind a chewy jam.
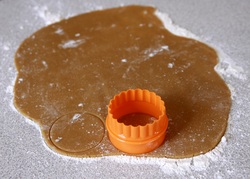
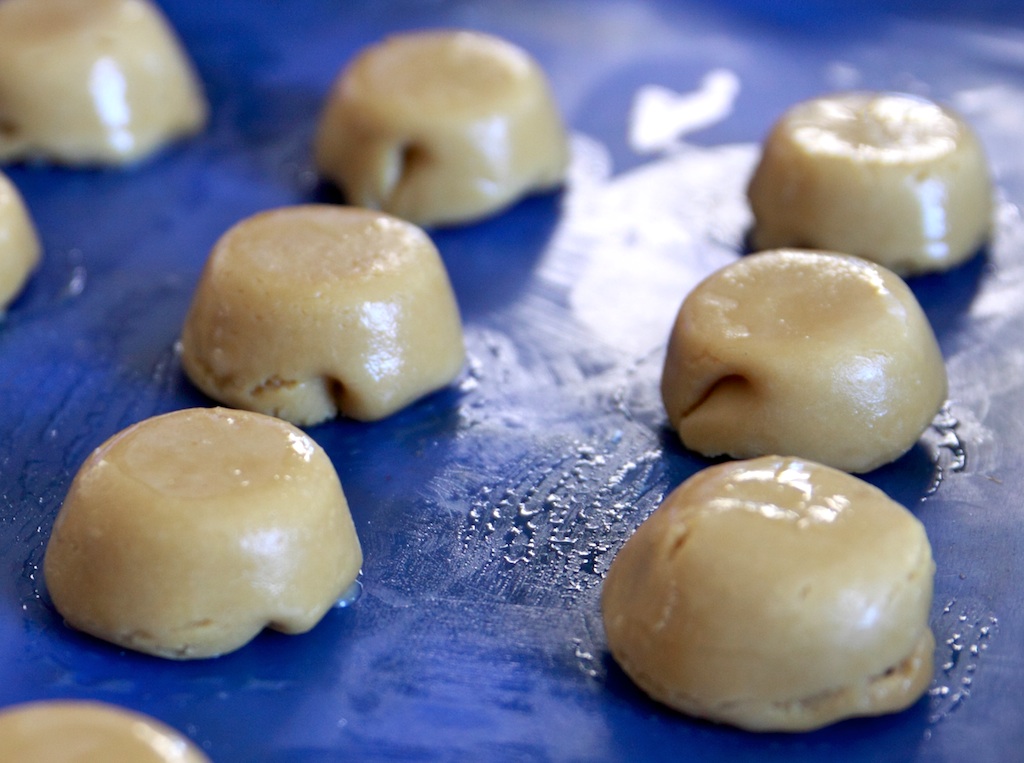
Roll out the dough on a floured bench and cut out rounds 7-8 cm in diameter.
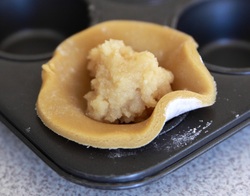
Place a teaspoon of the filling on each round. We used a mini muffin tin to assist in the process, but this isn't necessary.
Squeeze the edges of dough together, pushing gently into the tin, before turning out onto a baking tray lined with baking paper. Glaze with beaten egg.
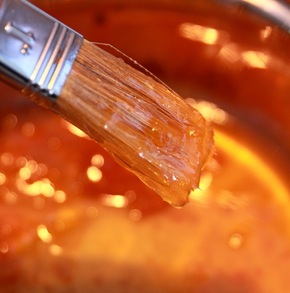
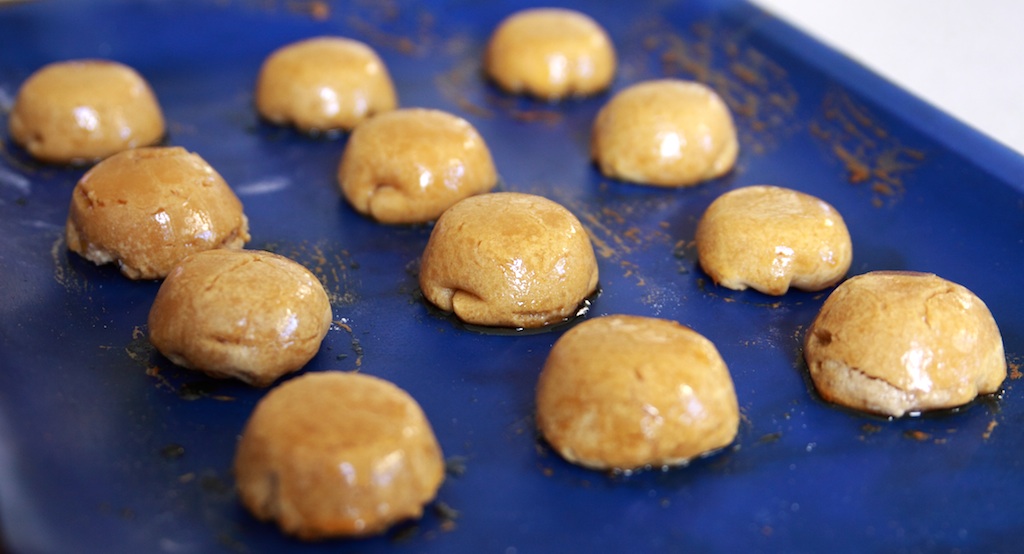
Bake for 10-15 minutes until golden brown. While the moon cakes are baking, mix the golden syrup with hot water. As soon as you take the cakes out of the oven, brush them with the syrup.
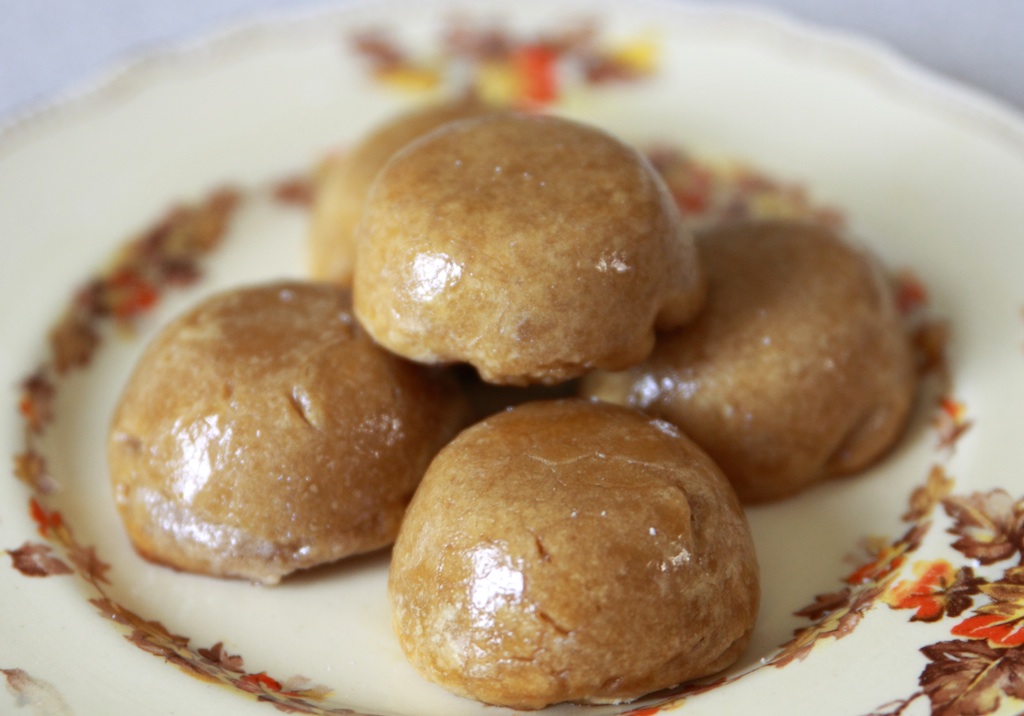
The moon cakes can be served as is or dusted with icing sugar. If you are feeling particularly creative, they could be topped with marzipan or sugar decorations. The red berries and green leaves of holly would transform them into a unique Christmas nibble.
If you want to retain the Regency feel, we recommend accompanying them with a Chinese tea, such as Oolong or a Green Tea. (Remember, Indian tea did not reach England until the 1830s!) If you happen to have a period cake basket to serve them in, all the better!
In Melbourne, cake aficionados can go to the Brunetti or Monarch cake shops to satisfy their passion. There they are confronted with 'torte heaven' and a visual and taste experience to remember. However, you don't have to be in Melbourne to delight in the joys of a torte. You can create this magnificent Malakoff Torte and we will even reveal how it can be achieved without using an oven! The Malakoff Torte was created during the Crimean War to celebrate the French Maréchal Pélissier's victory storming the tower of Malakoff which brought the Siege of Sevastapol to an end. Pélissier was rewarded with the title of first (and last) Duc de Malakoff and a magnificent torte was whipped up for the occasion, without the use of an oven. For our endeavour it's easiest to use an oven, but we will mention how it can be done without one so as to recreate an authentic Malakoff Torte. The beauty of this cake is that it is has all the attractions of a torte but is achievable for novice or very busy cooks. At the end, we'll also demonstrate how the skills you've learnt making the Malakoff Torte can be easily used to make other tortes, as well as how you can decorate them in spectacular fashion. Malakoff Torte
 The Base1/4 cup flour
40g corn flour
1/8 cup cocoa
2 large or 3 small eggs
60g sugar
1 tsp vanilla sugar
small pinch of salt
35g hot melted butter
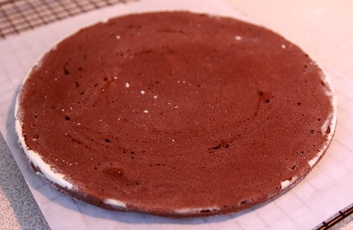
Pre-heat oven to 180 degrees Celcius. If necessary, grease a 24cm spring form cake pan with butter and sprinkle with flour. (This shouldn't be necessary with a non-stick pan, but it never hurts.)
Mix the two flours with the cocoa and sift. Cream the eggs, sugars, and salt until fluffy. Fold in flour mixture. Gently mix in hot butter.
Pour into pan, spreading the mix to the sides evenly. Bake for around 30 minutes. (If you want to be super authentic or your oven breaks down - yes, this does happen! - bake it in a fry pan over very low heat with a lid.) As soon as it is cooked, sprinkle the top with flour or sugar and invert onto baking paper on a cooling rack. When cool, cut off the edge up to a centimetre wide. (This is not necessary if you don't intend to cover/decorate the sides.)
The Syrup
Whether you use layers of cake or off-the-shelf biscuits, it's best if they are softened with an alcoholic beverage such as brandy, rum, or sherry, ideally using a sugar syrup. When an alcohol-free cake is required, use brandy or rum essence instead or omit completely.
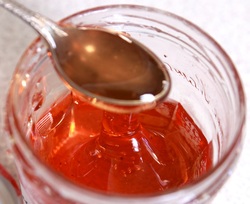
Bring 50ml of water to the boil with 50g of sugar until dissolved. Chill, then stir in 50ml of brandy or rum.
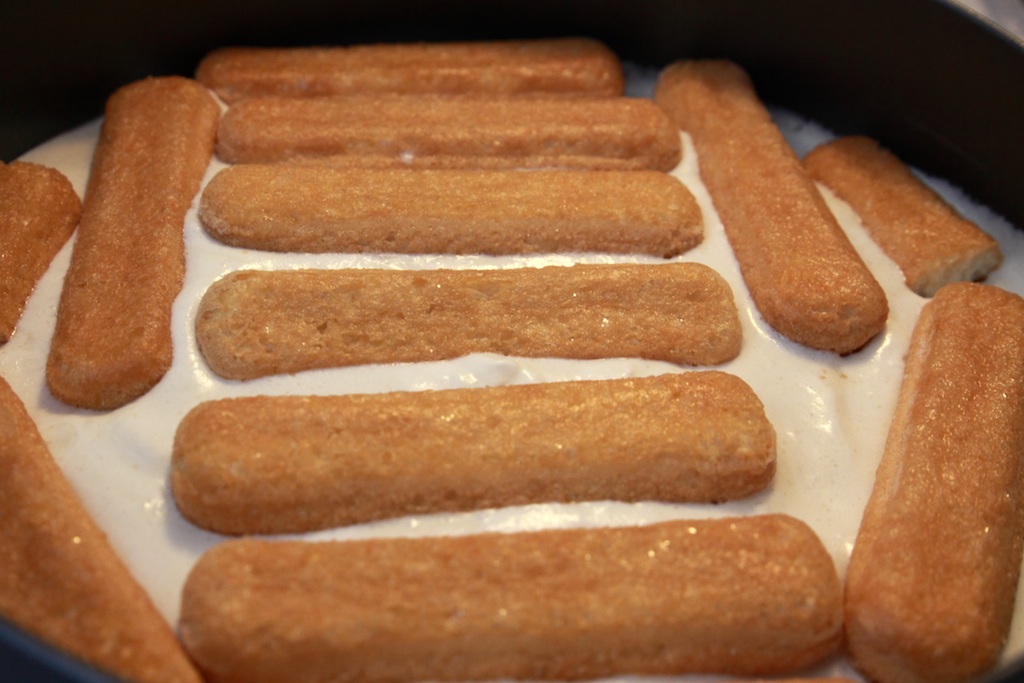
The Biscuit Layer
We simply bought a packet of Savoiardi (ladyfinger) biscuits from the supermarket. If you can't find them or feel particularly motivated you can make your own, but you shouldn't feel any guilt whatsoever if you don't. Our guess is that the creators or the Malakoff Torte probably used old biscuits from a tin.
The Cream Filling
15g powdered gelatin soaked in 85ml milk
75 ml strong coffee
150 ml milk
pinch of salt
3 eggs
60g castor sugar
300ml cream (whipped)
Prepare the gelatin and coffee. Separate eggs. Add the sugar to the yolks and whisk until creamy. Gently warm the milk and coffee so that it is warm but not hot. Add to the egg mixture and whisk over heat until almost too hot to touch (c. 65-70 degrees), being careful not to scramble the eggs. (If you do, put the mixture through a sieve. It's not the end of the world.) Add the gelatin mixture and whisk. Cool. The mixture should be no warmer than lukewarm. If you haven't whipped your cream, this is a good time to do so. Then whip the egg whites. At the last moment before assembling your cake, add the coffee mixture to the whipped cream and mix, then gently whisk in the egg whites. If unavoidably interrupted, put the mixture in the fridge so it doesn't run everywhere.
Assembling the Torte
Take your spring form pan and remove the base. Place it on a board or flat dish. Ensure that you have all your 'components' ready as it is important to assemble the torte fairly quickly.
First, place the base inside the ring and brush with the sugar syrup. Pour in a layer of coffee cream and spread evenly to the edges. Then add a layer of Savoiardi biscuits, brushing each one on the flat side before laying them down flat side up. Repeat with coffee cream and remaining biscuits. Finally, cover the torte with the remaining cream. Refrigerate (or even freeze). If you freeze the torte, allow a couple of hours for it to thaw before serving.
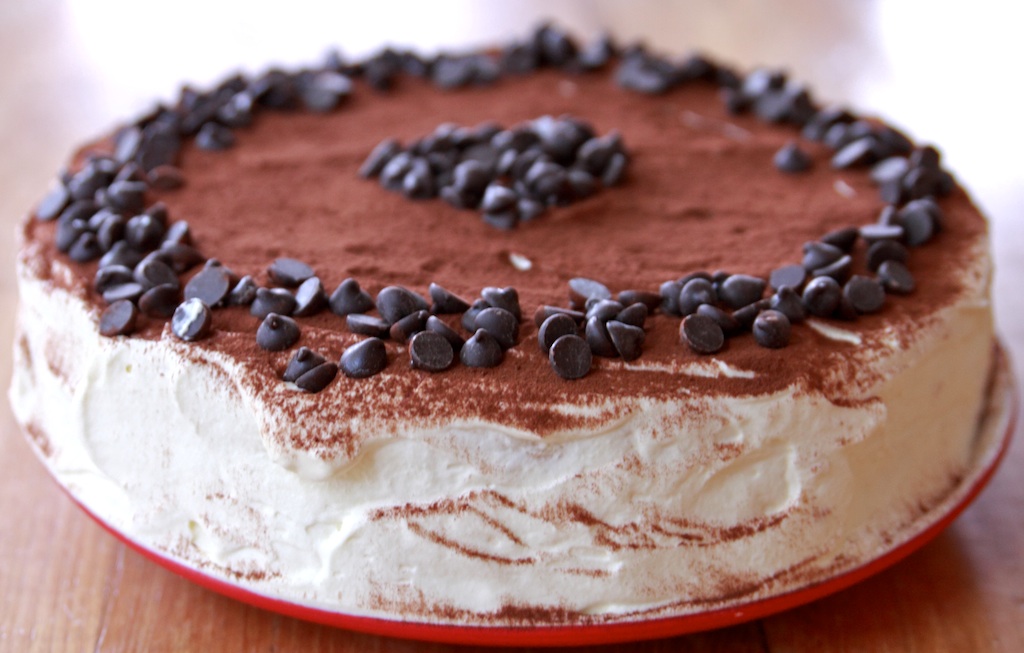
Finishing Touches
Cover the entire torte with 300ml of whipped cream. Dust with cocoa and sprinkle dark chocolate buds on top. Alternatively, dip Savoiardi biscuits two-thirds in dark chocolate and arrange in spoke-like fashion, or fashion your own decorations using dark chocolate.
Keep refrigerated. Best served 12 - 24 hours after making.
Creating Your Own Torte
The Base and Layers
Use the basic base recipe from the Malakoff Torte to create the base and cake layers for your torte. Depending on how tall a cake you want, you'll need to double or triple the ingredients.
Experiment with different flavours. For example, substitute the cocoa with the same amount of flour plus an essence such as almond or rum, or add the zest of half a lemon or orange.
Likewise, with the cream layers, substitute the coffee and make a lemon, strawberry, or chocolate cream instead.
Chocolate Crunch
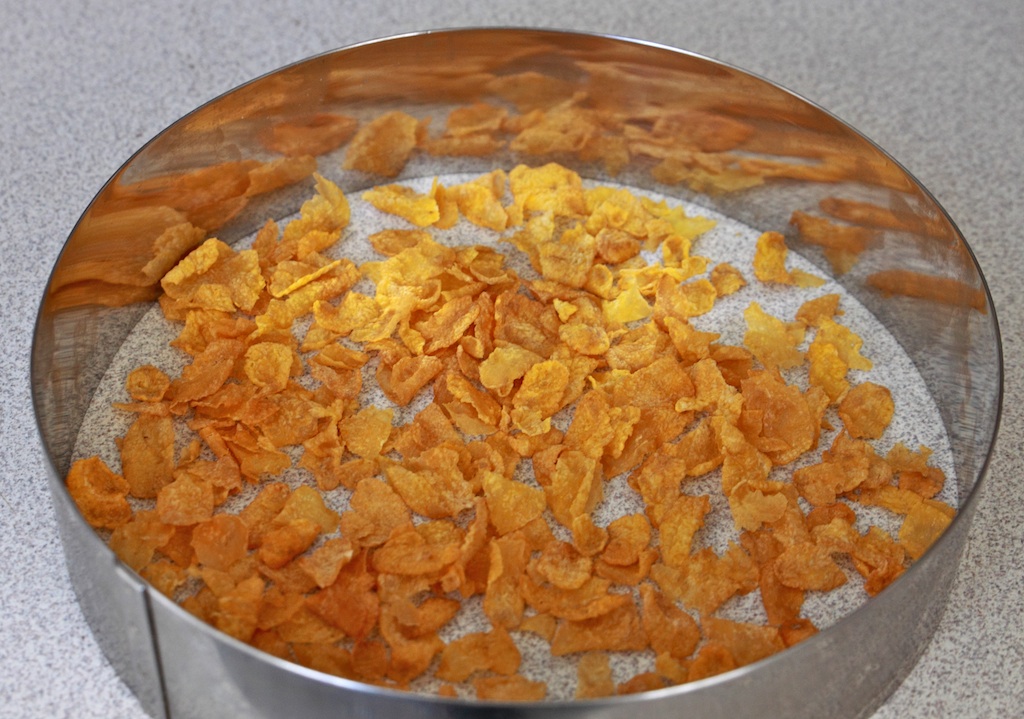
Another option is to create an extra layer of chocolate crunch in the middle. It's as simple as adding melted chocolate to either rice bubbles or crushed corn flakes, rolling it between baking paper, letting it set, and cutting out a disc slightly smaller than your cake ring. Measure the amount of crunchy cereal by placing it in a layer inside your cake ring, using more or less according to your preference. We added approximately 100g of melted chocolate.
Top and Sides
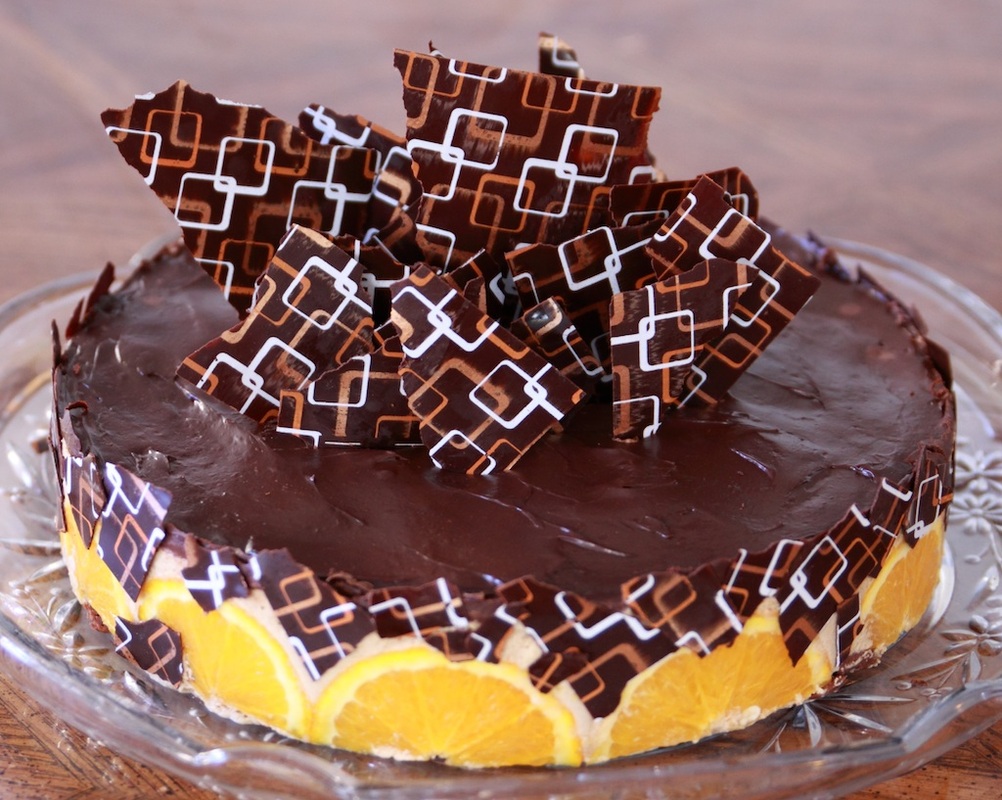
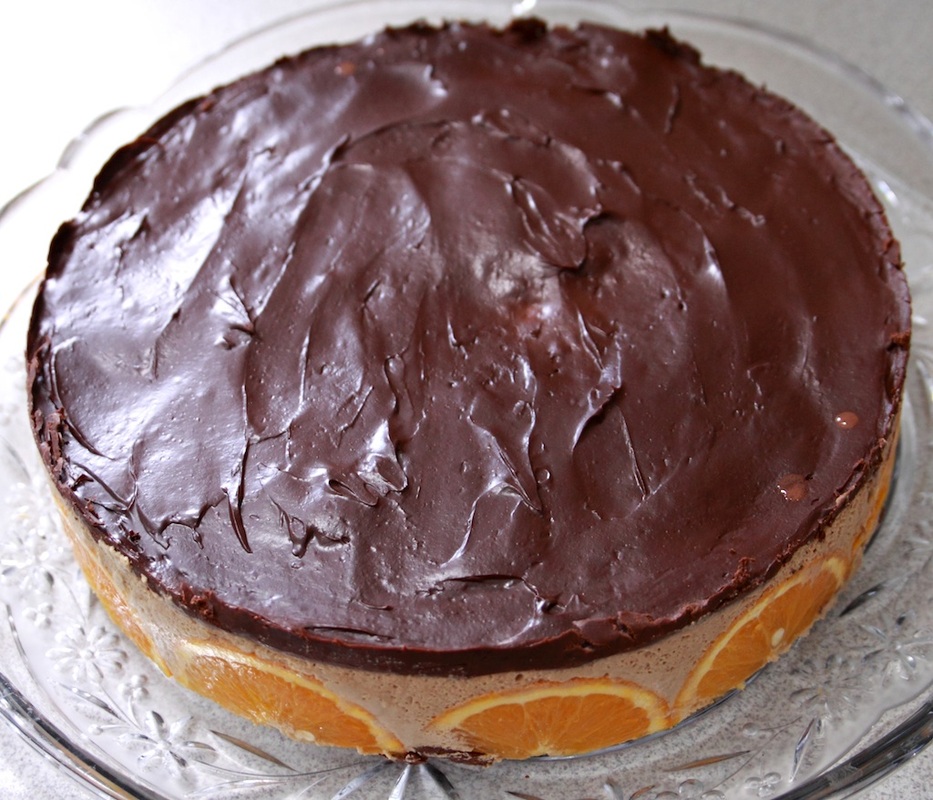
Whipped cream is far from the only option when it comes to the top layer of your torte. Cakes look fabulous glazed with jam, especially if they're fruit flavoured. Chocolate or coffee tortes can be finished off with a thin layer of melted chocolate or a chocolate ganache (which is softer). Both can also be used on the sides.
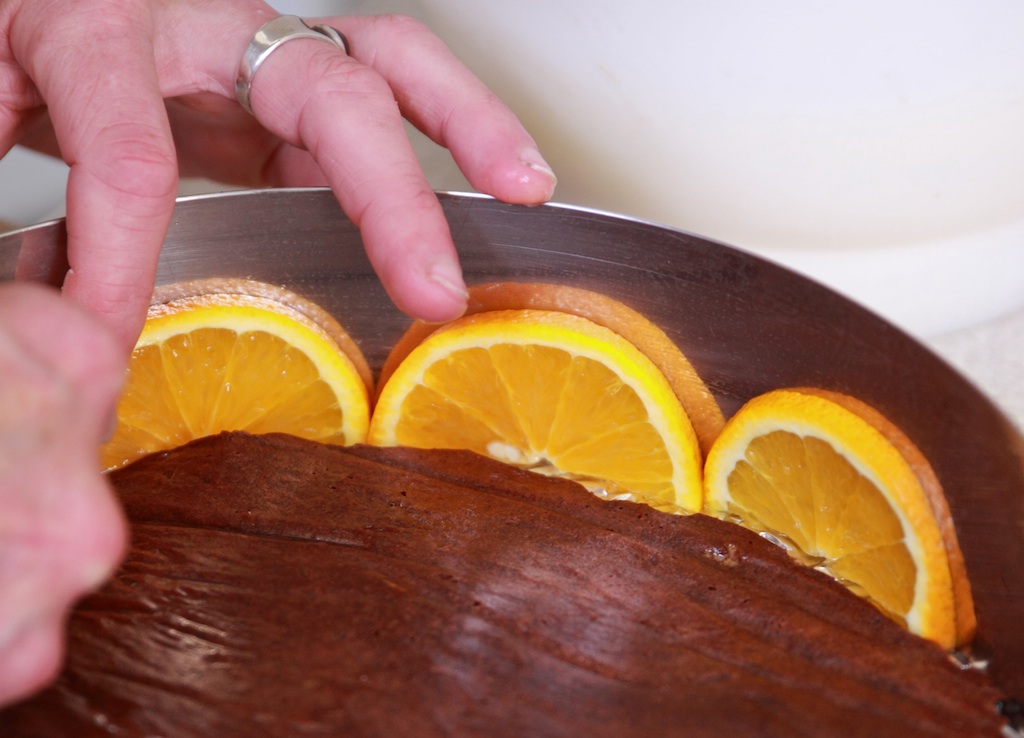
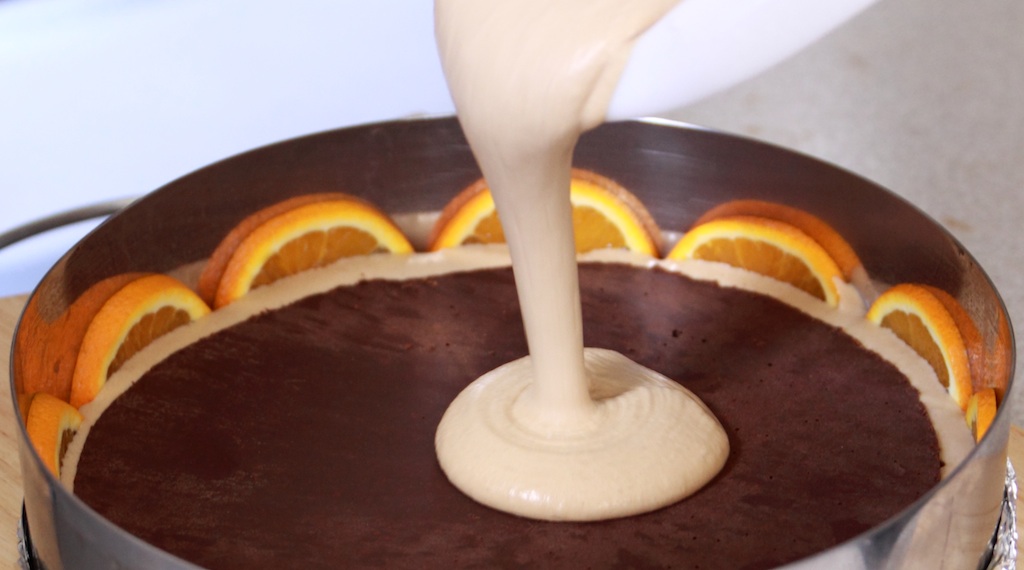
Orange slices and other fruit are an easy way of adding pizzazz to your torte, but almost anything edible can be used to line the sides. This is far from necessary, but it's a great way of adding a personal touch, especially if the cake's for someone special and you use something you know they particularly love. The cake we made below had the additional chocolate crunch as well as the orange slices and chocolate ganache topping.
Chocolate Ganache
220g dark chocolate
165 ml cream
Combine chocolate and cream in a heatproof bowl over a saucepan of simmering water. Stir until smooth. Remove from heat. Allow to cool, stirring occasionally until ganache is thick and spreadable.
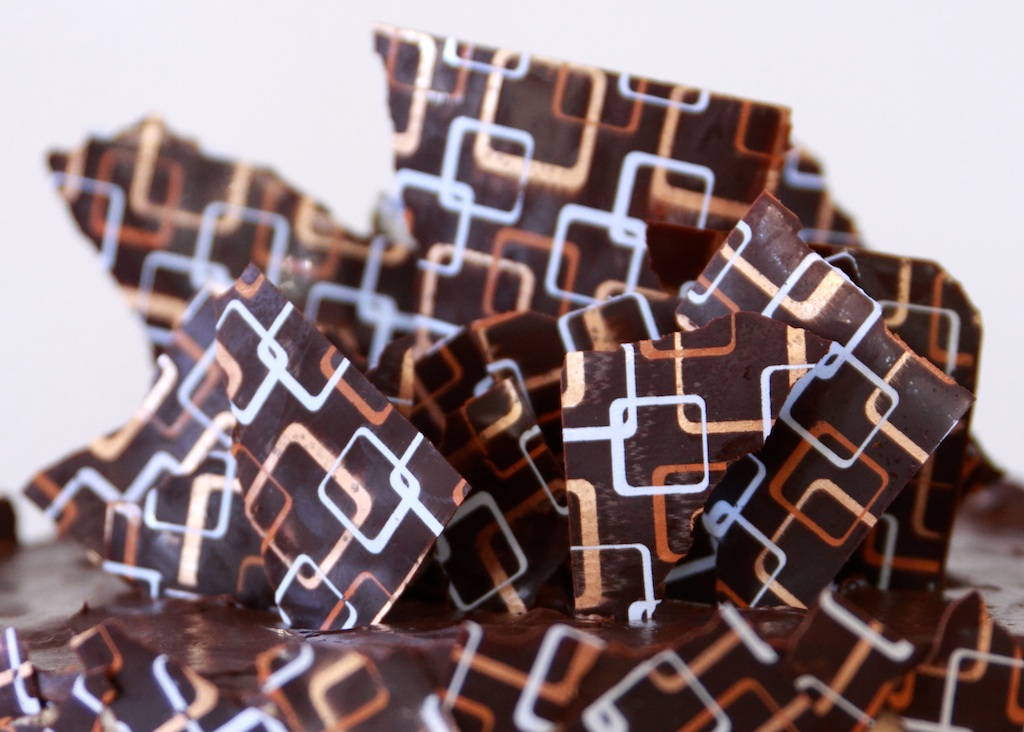
Chocolate Stencils
Chocolate stencils can be easily purchased, but you may have to ask. They're often a 'behind the counter' item as they're mostly used by professionals. We purchased ours at Cocobean in Launceston.
Using them is a matter of spreading melted chocolate in a thin layer and allowing it to cool (in the refrigerator if necessary) before breaking or cutting into pieces and using them to decorate your cake however you want. Your imagination is the limit. We broke ours into shards and stuck them in the middle of the cake creating what was later dubbed a 'Sydney Opera House effect'. This is a great way of decorating a cake, especially if you want a modern or masculine effect or are tired of piped roses and flowers.
 The French fashion of cheese as a dessert course has existed since the nineteenth century, and many of us would not think of doing anything with Brie other than eating it raw. Occasionally, you may come across a dish in which Brie is melted as part of the recipe, for example when baked in a brioche, but it is rare to find Brie mixed in as an ingredient in a dessert. Either way, Chef Dirk "doesn't do Brie", so today's post is going to be heavier on history than culinary expertise.
Brie can trace its history back to Medieval times. Like wine and beer, cheese-making was an industry dominated by Benedictine and Cistercian monks. According to Charlemagne's biographer E(g)inhard, the Emperor was so enthusiastic about the cheese of Reuil in Brie that he pronounced it "one of the most marvellous of foods" and requisitioned two crates of it. Given that in these times both courses had sweet and savoury dishes, it is possible that the tradition of eating cheese as well as dessert at the end of a meal hails from this time.
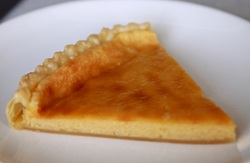
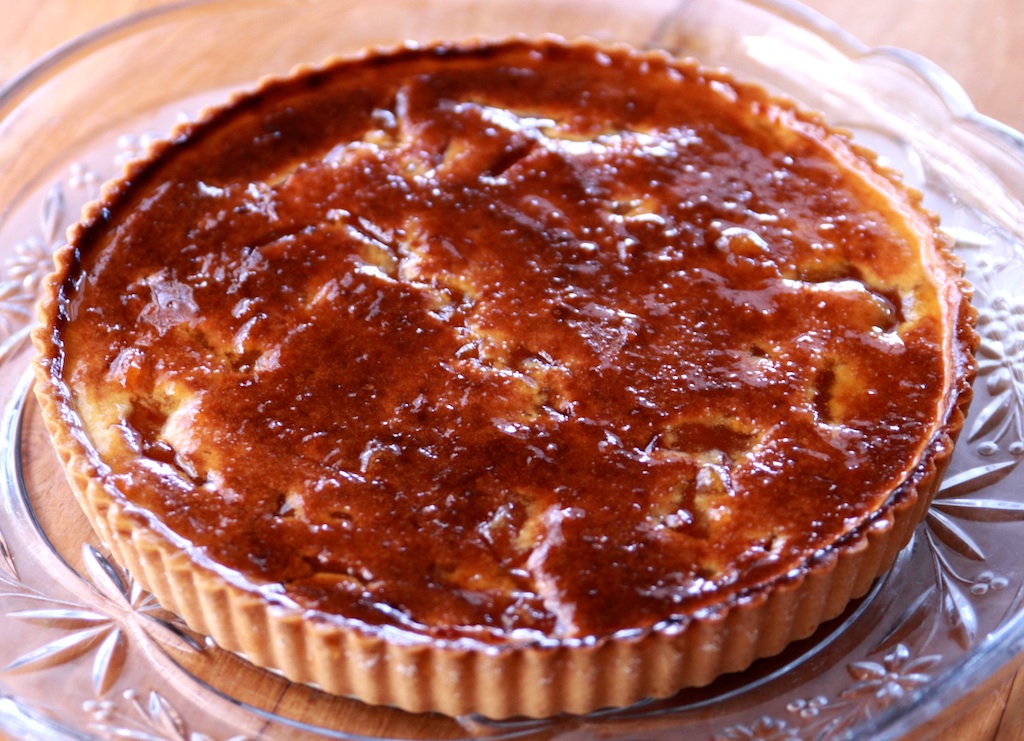
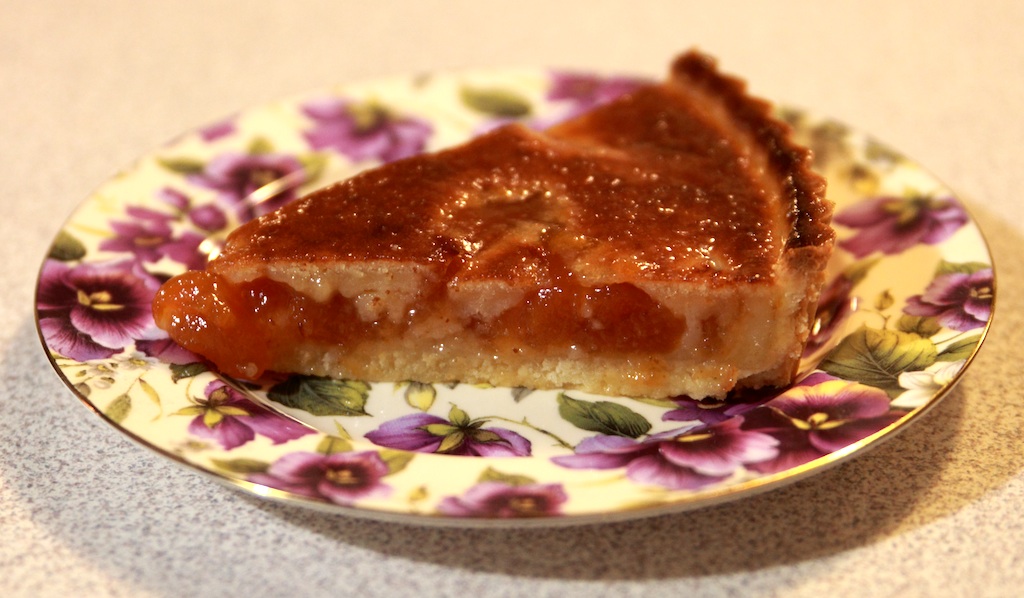
This recipe is taken from The Forme of Cury of 1390, compiled by the Master Cooks of King Richard II, and is a mildly sweet - it must be remembered that sugar was an expensive luxury - but rich tart. The recipe asks for "chese ruayn" which all other historians have take to mean a soft English cheese made of "rewain" grass, but given that the recipe is actually called "Tart de Bry" I am more inclined to think that it refers to cheese from Reuil in Brie, that is "Reuil-an". Regardless of what King Richard's cooks meant, it was supposed to be a Brie tart, so I recommend using Brie (or Camembert) unless, like Chef Dirk, you "don't do Brie".
Ingredients:
shortcrust pastry (frozen is fine, but it should not be sweetened; make it using lard if you want to be authentic)
pinch of saffron
20ml hot water (from kettle)
500g cheese (Brie)
5 egg yolks
75g (raw) caster sugar
pinch ground ginger
pinch salt
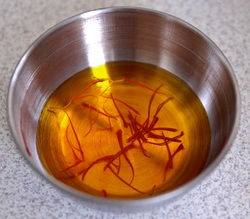
Begin by pre-heating your oven to 190 degrees Celcius and steeping the saffron strands in hot water until it is a deep gold. Line a flan tin with the pastry and prick the base with a fork.
Next cut the rind off your cheese, and slice into pieces no larger than two inches.
Beat with an electric mixer until creamy and fairly smooth.
In a separate bowl, beat the egg yolks and sugar until thick and pale.
Then add the cheese, followed by the ginger, salt, and (strained) saffron water. Pour into the pastry case and bake for 20 to 25 minutes. Serve warm or cold but on the same day.
The French cherish their culinary terms nearly as much as the objects of their culinary passions. When the Académie Française - who publish the French equivalent of the Oxford Dictionary -called a clafoutis a "fruit flan", the citizens of Limousin saw red and did not desist until it was redefined as a "cake". Furthermore, these pastry-less "cakes" can only be called clafoutis if they're made with cherries. Otherwise, they are flaugnardes.
Interestingly, Francatelli's Plain Cookery Book for the Working Classes from 1852 has a recipe for a 'Batter and Fruit Pudding' which bears a striking resemblance to a flaugnarde. No doubt the French would speculate that Francatelli picked up this recipe while training in France. It is more likely that such a pudding was fairly commonplace in western Europe from medieval times and that it was popularised in the historic Duchy of Aquitaine, with the Limousin region specialising in a cherry version. The name clafoutis makes its first documented appearance in 1864, and in its 'home' regions it is often called a milliard, suggesting a far longer history.
Of course, Limousin's capital Limoges is best known for its porcelain, so (if you happen to have any) a clafoutis will give you the perfect excuse to show it off. You could also use this "cake" as a springboard for a discussion of Anglo-French relations (which should transform the dullest of dinner guests into experts on international affairs). Whether you want to ponder the true origins of this so-called "cake", whether the Black Prince really did massacre thousands in Limoges, or the merits of Renoir versus Whistler, the flaugnard or clafoutis is an excellent accompaniment.
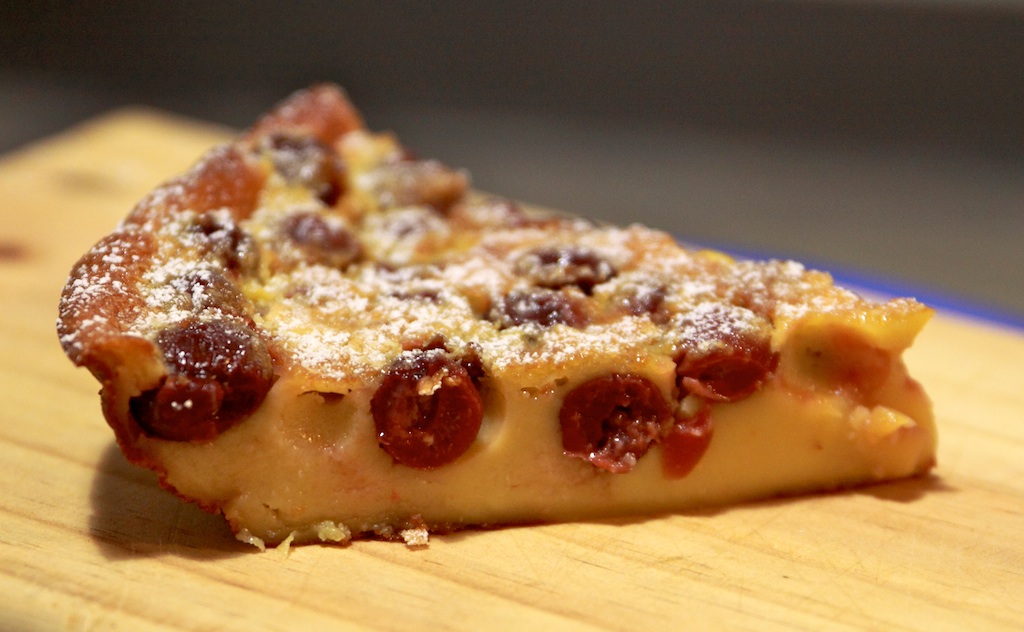
Cherry Flaugnarde
(a.k.a. Clafoutis or Milliard)
There are many practical reasons to prefer a flaugnarde to a flan. Even though making pastry only takes ten minutes or so, ten minutes matters when you have very young children or have just come home after a long day. A flan also has the disadvantage of being off-limits for our gluten-free or Coeliac friends. So we've decided to share with you a super-quick gluten-free clafoutis recipe.
Ingredients:
150g castor sugar
50g custard powder (gluten free)
200ml eggs (4 large)
350ml cream
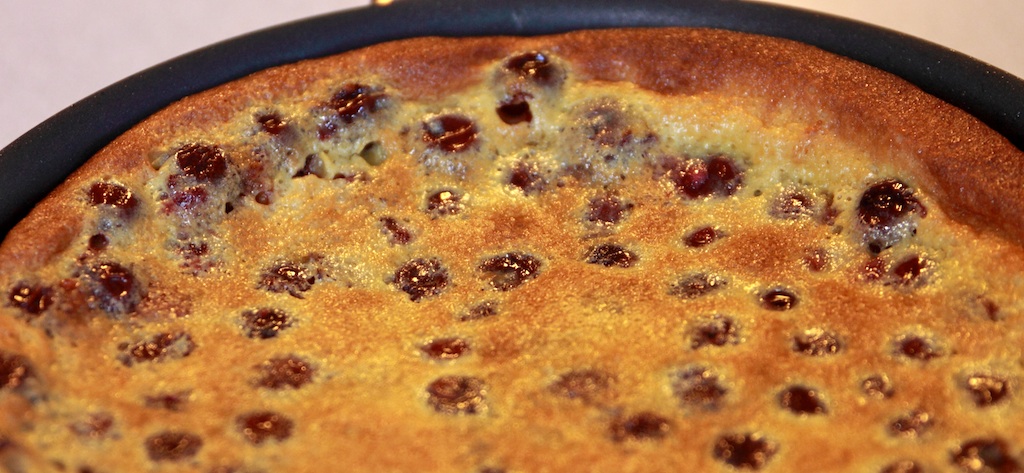
600-750g jar of pitted cherries (or equivalent)
castor sugar for coating cherries (optional)
icing sugar for dusting
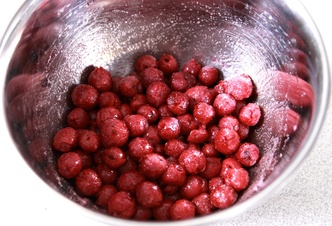
Begin by pre-heating your oven to 180-200 degrees Celcius and placing a greased oven-proof dish in the oven to warm. Drain the cherries and (if you prefer it) toss them in sugar. You may also wish to consider soaking the cherries in brandy for a few hours if you're making the clafoutis for a special occasion.
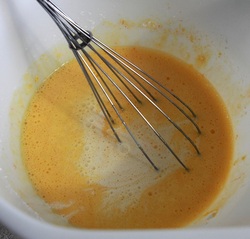
Whisk the remaining ingredients in a bowl. We recommend adding the eggs to the sugar and custard powder, then mixing in the cream.
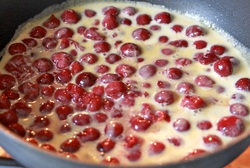
When the oven is ready, pour a little of the batter into the hot pan, and add the cherries.
Then pour in the remaining batter and give the pan a little shake to distribute the cherries evenly.
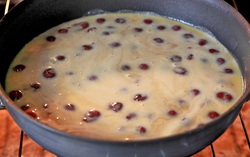
Bake for 40-50 minutes.
When cooked, the clafoutis will be bouncy and firm to the touch. It will puff up, especially around the sides, a little reminiscent of a Yorkshire pudding, then subside as it cools.
Serve warm or cold, dusted with a little icing sugar.
Fruit Flan (Fruit Tart)
A flan (or tart) differentiates itself from the flaugnard by means of its pastry case. This recipe can easily be made in the style of a flaugnard simply by omitting the pastry. It can, furthermore, be made gluten free by using gluten free flour or almond meal. IngredientsFilling:zest and juice of one lemon200ml sour cream1 large egg100g sugar70g flourfruit, e.g. stewed apricots or canned peaches (drained) Pastry:225g unsalted butter100g castor sugar1 egg350g plain flour(For the method, see how we made the pastry for the Nougat de Tours.) Glaze:1/3 cup apricot jam1 tbl waterPre-heat oven to 180-200 degrees Celcius.

Mix the filling ingredients in a bowl, leaving the fruit until last or keeping it separate. If separate, pour a little of the filling into your pastry case, then arrange the fruit evenly across the flan.
Fill the case making sure all the fruit is covered.

Bake for 40-45 minutes until the middle no longer wobbles and is firm to the touch.

Sprinkle with icing sugar (using a sieve) and put under the grill until it browns. (Don't worry if there are white patches - they will disappear when glazed.)
Allow tart to cool on a wire rack.
Heat the jam and water in a small saucepan. Brush the tart with the jam and allow it to set before serving.
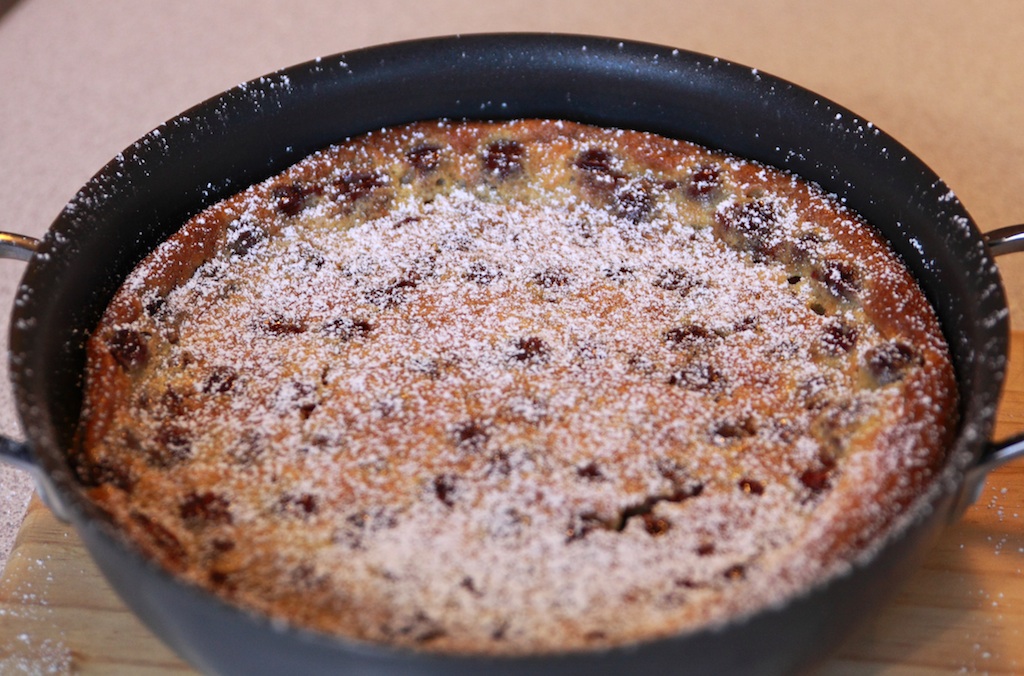
La belle cuisine is taken very seriously in France, and the Nougat de Tours is no exception. Its history goes back to at least the Renaissance, and it even has its own confraternity. But that's not the reason we've chosen it as our inaugural recipe. We just like its simplicity and versatility. There are fabulous historical associations with Tours that add to our appreciation of this delicious tart. We all enjoy the traditions associated with the Twelve Days of Christmas, and some of you may even be familiar with Michaelmas - after all, schools in the UK still refer to a Michaelmas term. There is also Martinmas, but it has fallen out of favour over the last century, mostly because of the unfortunate concurrence of Armistice Day.
"But what's Martinmas got to do with the Nougat de Tours?" you ask. Well, Martinmas is the Feast of St Martin of Tours, and Tours is one of the famous pit-stops on the historical pilgrimage route to Santiago de Compostela. And it's thanks to the legend of St Martin's cloak that we have the words chapel and chaplain. St Martin, born in Hungary, grew up in Italy and then spent the majority of his life in France. He is considered a 'spiritual bridge' across Europe. As we intend to sample the cuisine of many countries, particularly European ones, we hope the Nougat de Tours will be a 'culinary bridge' into the world of the Historian and the Chef.
Martinmas (November 11) also falls just before Advent, a penitential period heralding the celebrations and feasting of Christmas. In past times, Advent was longer and began immediately after Martinmas. Like the forty days of Lent, it was another forty day period recalling Christ's tribulation in the desert, a period of waiting for the coming of the Messiah. Eggs would have to be used up before such a period of fasting (which is one of the reasons we eat pancakes on Shrove Tuesday). This recipe calls for five eggs and is native to Tours, so it's a perfect Martinmas treat.
Like many enduring recipes, it has a fairly humble past. It can easily be regarded as merely a peasant dish using the most basic of ingredients. The beauty of such dishes is that they are what you make of them. With the slightest variations, the Nougat de Tours can be served at a fine dinner party or a rustic supper, a ladies' morning tea or a picnic in the countryside.
This is what you'll need....
A pie/flan mould. A metal one with loose bottom is easiest, but a silicone or ceramic one is fine. We used one that is 24cms in diameter at the base.
For the pastry:
115g icing sugar
175g butter
2 eggs
340g flour
25g corn flour
For the macaronade:
5 egg whites
20g castor sugar
100g almond meal
80g castor sugar
a large handful of raisins (soaked in your choice of beverage)
icing sugar for dusting
Note: These amounts will make more pastry than you need, so you can either make two tarts (double the macaronade ingredients), halve the pastry amounts, or make something extra (which we'll show you at the end as a bonus). The amounts for the macaronade are easy to manipulate using the principle of tant pour tant - equal amounts of almond meal and sugar. The corn flour isn't essential, so if you don't have any just top up with regular flour. In fact, you don't even need to make the pastry yourself - frozen pastry is fine, but there's nothing like being able to say you made it yourself. You can also use a substitute for the almonds. (Nougat comes from the word noix, French for nut or walnut.)
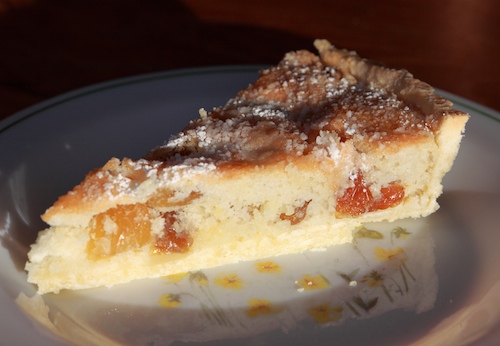
Your choice of beverage and fruit will strongly influence the nature of the tart. To make a delicate tart for fine dining, we recommend soaking golden raisins, cranberries, or chopped dried apricots in brandy or sherry. For a more robust taste, we soaked muscatels in coffee. You can also use mixed dried fruit or, as has become common, fruits confits (candied fruit) with a confiture. (Mishka rather likes the sophistication of a confiture of orange slices.) Your personal taste and choices, along with the way you cook and present it, will make your Nougat de Tours an expression of who you are. Once you make these choices, the recipe becomes yours. It's your Nougat de Tours.
 The Pastry
Making pastry shouldn't be stressful. Quite the opposite! It really should be a therapeutic experience. This is why we're using a basic sweet pastry recipe that you can use for any tart of your choice. It doesn't even need to be blind baked! You can jazz it up when you feel more confident, but it really isn't necessary. Simplicity has its advantages.
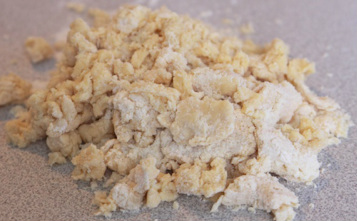
Using the paddle attachment on your stand mixer, combine the butter and icing sugar, before switching to the dough hook and adding the eggs, then the two flours. (You don't need to cream the butter and sugar - it's more like rubbing in.) Once they're roughly mixed, dump your clumps of dough on a clean bench and begin kneading. This is the therapeutic part.
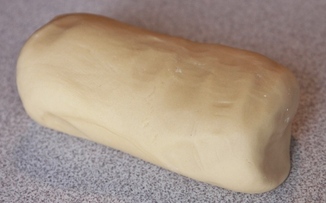 It shouldn't take long before you have a nice smooth dough which you can mould into two thick logs. If you over knead it (or are working in a very warm kitchen), it may become difficult to manage, but don't fret, just put it in the refrigerator for a short while. Put one log aside for later.
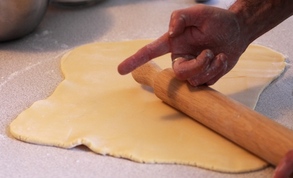 Dust your bench with some flour and roll out your log. If you do this methodically, it should come out fairly square. Roll up and down, turn ninety degrees and roll again. Then roll on the diagonals and so forth. The idea is to get a smooth and even sheet approximately half a centimetre in height. Glide your palm across the dough - caress it! - to find any bumps, and smooth them out with the rolling pin.
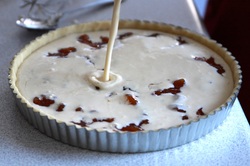
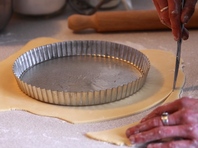 Grease your tin - we used an olive oil spray - and place it on top of the dough so that you can use it as a guide to cut your pastry into a circle. This doesn't have to be neat, just make sure you err on the side of caution so that you have enough pastry for the sides.
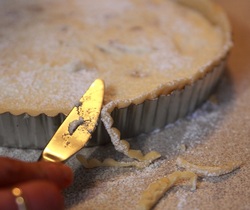
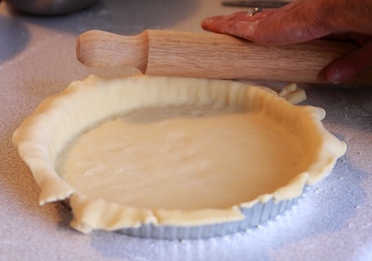 Now place your pastry inside the tin and press it in. Once that's done you can cut off the edges by simply rolling your rolling pin in an outward direction along the edge of the tin.
 Finally, prick the base with a fork. This will stop air bubbles forming and means you won't need to do a blind bake.
 The Macaronade:
We like to begin this part of the recipe by making a cup of tea or coffee. If it's later in the day and you're making the Nougat de Tours for a dinner party, you may prefer something stronger. At the same time, soak your raisins (or other fruit) in the beverage of your choice (or hot water if you want a minimalist taste).
You should also pre-heat your oven to somewhere between 180 and 200 degrees Celcius. We chose 180 degrees for the Nougat de Tours pictured, but we found 200 degrees better for a more rustic Nougat using coffee-soaked muscatels.
Before making the macaronade, rinse your bowl with a few teaspoons of white vinegar (to remove any fat residue). You should do this whenever whipping egg whites to ensure they work and to hasten the process.
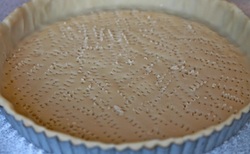
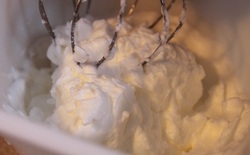
Whip the egg whites with the 20g of castor sugar until stiff.
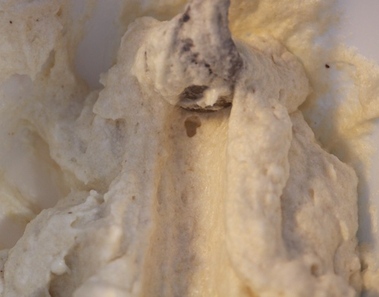 Mix the remaining castor sugar with the almond meal, then fold into the egg whites with a metal spoon.
Drain your raisins (or other fruit) and fold them in too; or, if you prefer, spread your fruit on the pastry to form a bed for the macaronade. The latter is necessary if using fruits confits with a confiture.
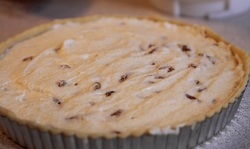 Then pour your macaronade into its pastry casing, smoothing it out gently with a spatula. If you're particularly concerned about appearances, remember that consistency and symmetry are key to not distracting from the overall beauty of your tart... and that the heat of the oven will smooth out minor flaws.
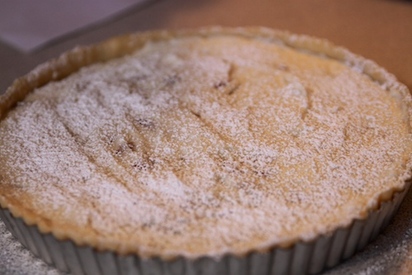 Dust your tart with icing sugar, and wait for it to sink in and dissolve.
 When it has done so, dust it a second time, trim the edge of the pasrty with a knife (cutting outwards), and bake for 25 to 35 minutes.
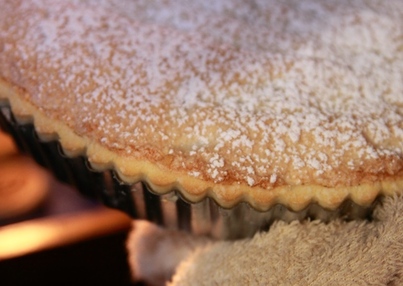 Having said that, it's best if you can form a habit of deciding for yourself when a dish is ready as ovens vary in temperature and heat distribution. You can tell if the Nougat de Tours is ready by looking at the edge. The crust should be slightly raised and turning golden brown.
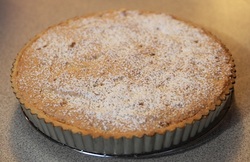 After you've taken your tart out of the oven, allow it to cool for 10-15 minutes (or completely if you wish to serve it cold) before putting it on a serving plate. If you are using a loose-bottomed pie tin, this is achieved easily by placing the whole tin on a bowl or other steady object with a smaller circumference and allowing the side frame to drop to the bench. You can then place the tart on its serving plate without damaging the sides.
Now that you've made your Nougat de Tours, there's the question of how to serve it. Softly whipped (or dolloping) cream isn't necessary, but wouldn't be inappropriate, especially if served as a dinner party dessert. Likewise, a sweet wine from the Touraine region of the Loire Valley would undoubtedly be a delightful accompaniment... but that was beyond the means of the Historian and the Chef.
Whatever character you give your Nougat de Tours, we hope we have equipped you to take this basic recipe and make it your own... and we hope we have inspired you to give all your food an individual touch.
But what about that leftover pastry dough? Read our next post to find out!
|


 RSS Feed